
Create a Data Set
Create a data set before importing measurements that should be reviewed together for a specific linear accelerator.
Open the Data Set Picker
Section titled “Open the Data Set Picker”- Go to Data > Scans.
- If the picker does not open automatically, click the selected data set area in the page header.
- Select the institution.
- Select the linear accelerator.
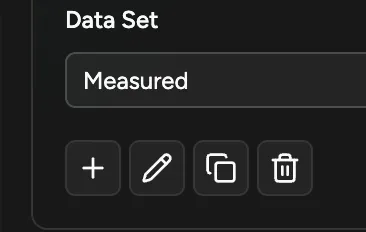
- In the Data Set section, click the Add data set button.
The add button is available when you have permission to write data.
The same selector is used on the Scans, Import, Export, and Databook pages. For selector basics, see Select a Data Set. Creating the data set from Data > Scans is the clearest starting point because you can immediately review the empty data set before importing.
Choose a Name
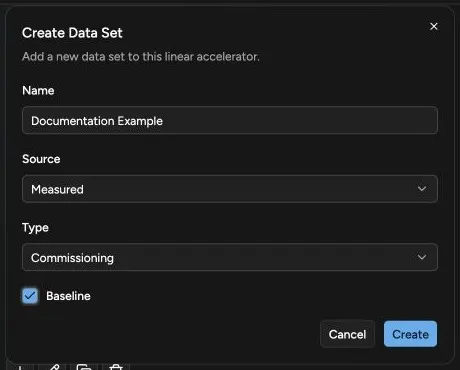
Section titled “Choose a Name”Enter a clear, unique name. Quadrant does not allow a blank name or a duplicate name under the same linear accelerator.
Use names that will still make sense later, for example:
TrueBeam Annual QA 2026Commissioning BaselineMonthly QA May 2026TPS Comparison Export
Choose the Source
Section titled “Choose the Source”Select the source that best describes where the data comes from:
| Source | Use When |
|---|---|
| Measured | The data comes from measurements or acquisition software. |
| TPS | The data comes from a treatment planning system. |
| Other | The data does not fit the measured or TPS categories. |
Choose the Type
Section titled “Choose the Type”Select the type that best describes the purpose of the data set:
| Type | Use When |
|---|---|
| Commissioning | The data belongs to commissioning or baseline beam data collection. |
| Annual | The data belongs to an annual QA or annual review workflow. |
| Monthly | The data belongs to a monthly QA workflow. |
| Misc | The data is outside the standard commissioning, annual, or monthly categories. |
Baseline
Section titled “Baseline”Check Baseline to label the data set as a baseline. Quadrant displays a Baseline badge in data set selectors. This setting does not automatically select the data set as Reference Data or restrict which data sets can be selected for a Validation comparison. Leave it unchecked when the data set should not carry the label.
Finish
Section titled “Finish”Click Create. The new data set is selected automatically so you can import data or review it immediately.
Correct a Baseline Choice
Section titled “Correct a Baseline Choice”If you selected the wrong Baseline setting before adding data, delete the empty data set and create a replacement:
- Select the empty data set.
- Click Delete data set.
- Confirm the deletion.
- Click Add data set.
- Enter a clear name, source, and type.
- Choose the intended Baseline setting.
- Click Create.
- Reopen the selector.
- Select the replacement.
- Confirm that the replacement is labeled Baseline only when intended.
If the incorrect data set already contains data, keep it in place until a replacement has been created and verified:
Follow Create and Verify the Replacement. When entering the replacement fields, choose the intended Baseline setting.
- Reopen the selector.
- Select the replacement.
- Confirm that the replacement is labeled Baseline only when intended.
- Ask your team to confirm that the incorrect data set is no longer needed.
- Select the incorrect data set.
- Click Delete data set.
- Confirm the deletion.
Manage Existing Data Sets
Section titled “Manage Existing Data Sets”When you have write access and a data set is selected, the picker also shows actions for existing data sets:
| Action | Use It For |
|---|---|
| Edit data set | Change the data set name, source, or type. |
| Copy data set | Create a new data set with a new name and copied scan data. The default name starts as the original name plus Copy. |
| Delete data set | Remove the selected data set. This action cannot be undone. |
For copy limitations and the safe alternative when wedge factors are required, see Copy a Data Set Safely.