
Import Data
Use Data > Import to add data into the selected data set. Imports always go into the data set shown in the header.
Before Importing
Section titled “Before Importing”Keep the source files or spreadsheet available so you can verify the imported data against the original record:
- expected scan types
- energies and particles
- field sizes
- depths and SSDs
- wedge information
- beam mode
Create the destination data set before starting the import wizard.
Select the Destination
Section titled “Select the Destination”- Open Data > Import.
- Select the institution, linear accelerator, and data set.
- Confirm that the header shows the data set that should receive the import.
For more detail on choosing or creating the destination, see Select a Data Set.

Choose the Import Type
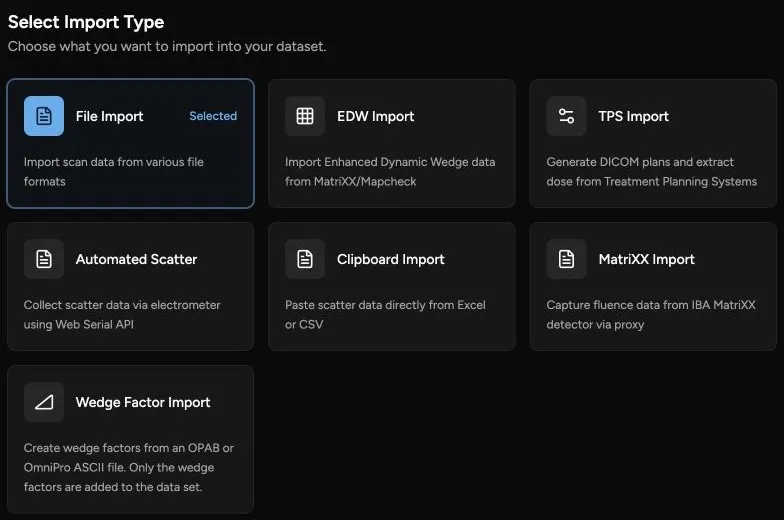
Section titled “Choose the Import Type”The import wizard starts with an import type. It shows the workflows available for your account; Automated Scatter appears only when your account has access to that workflow. Available choices include:
| Import Type | Use When |
|---|---|
| File Import | You have scan data files exported from a water tank, TPS, or supported measurement software. |
| EDW Import | You are importing enhanced dynamic wedge data from MatriXX or MapCHECK-style measurements. |
| TPS Import | You need to generate treatment planning system plans and extract dose data into the data set. |
| Automated Scatter | You are collecting or importing scatter data through the guided scatter workflow. |
| Clipboard Import | You want to paste scatter data directly from a spreadsheet or CSV-style table. |
| MatriXX Import | You are capturing fluence data from an IBA MatriXX detector through the configured capture workflow. |
| Wedge Factor Import | You have matching open and wedged point-dose measurements in an OPAB or OmniPro ASCII file and want to add only the calculated wedge factors. |
Choose the workflow that matches how the data was produced.
File Import
Section titled “File Import”File Import supports common scan export formats, including:
| Format | Typical Source | Extensions |
|---|---|---|
| myQA Accept OPAB | IBA | .opab |
| OmniPro ASCII | IBA | .asc, .txt |
| OmniPro RFA300 | IBA | .asc |
| OmniPro OPG | IBA | .opg |
| W2CAD ASCII | Varian Eclipse | .asc |
| W2CAD CSV | Varian Eclipse | .csv |
| PTW MCC | PTW | .mcc |
| Sun Nuclear | Sun Nuclear | .snctxt, .txt |
| DICOM Dose Plane | DICOM | .dcm |
| Monaco Dose Plane | Elekta Monaco | .all |
| RayStation | RaySearch | .csv |
| Quadrant | QUADRANT export | .txt |
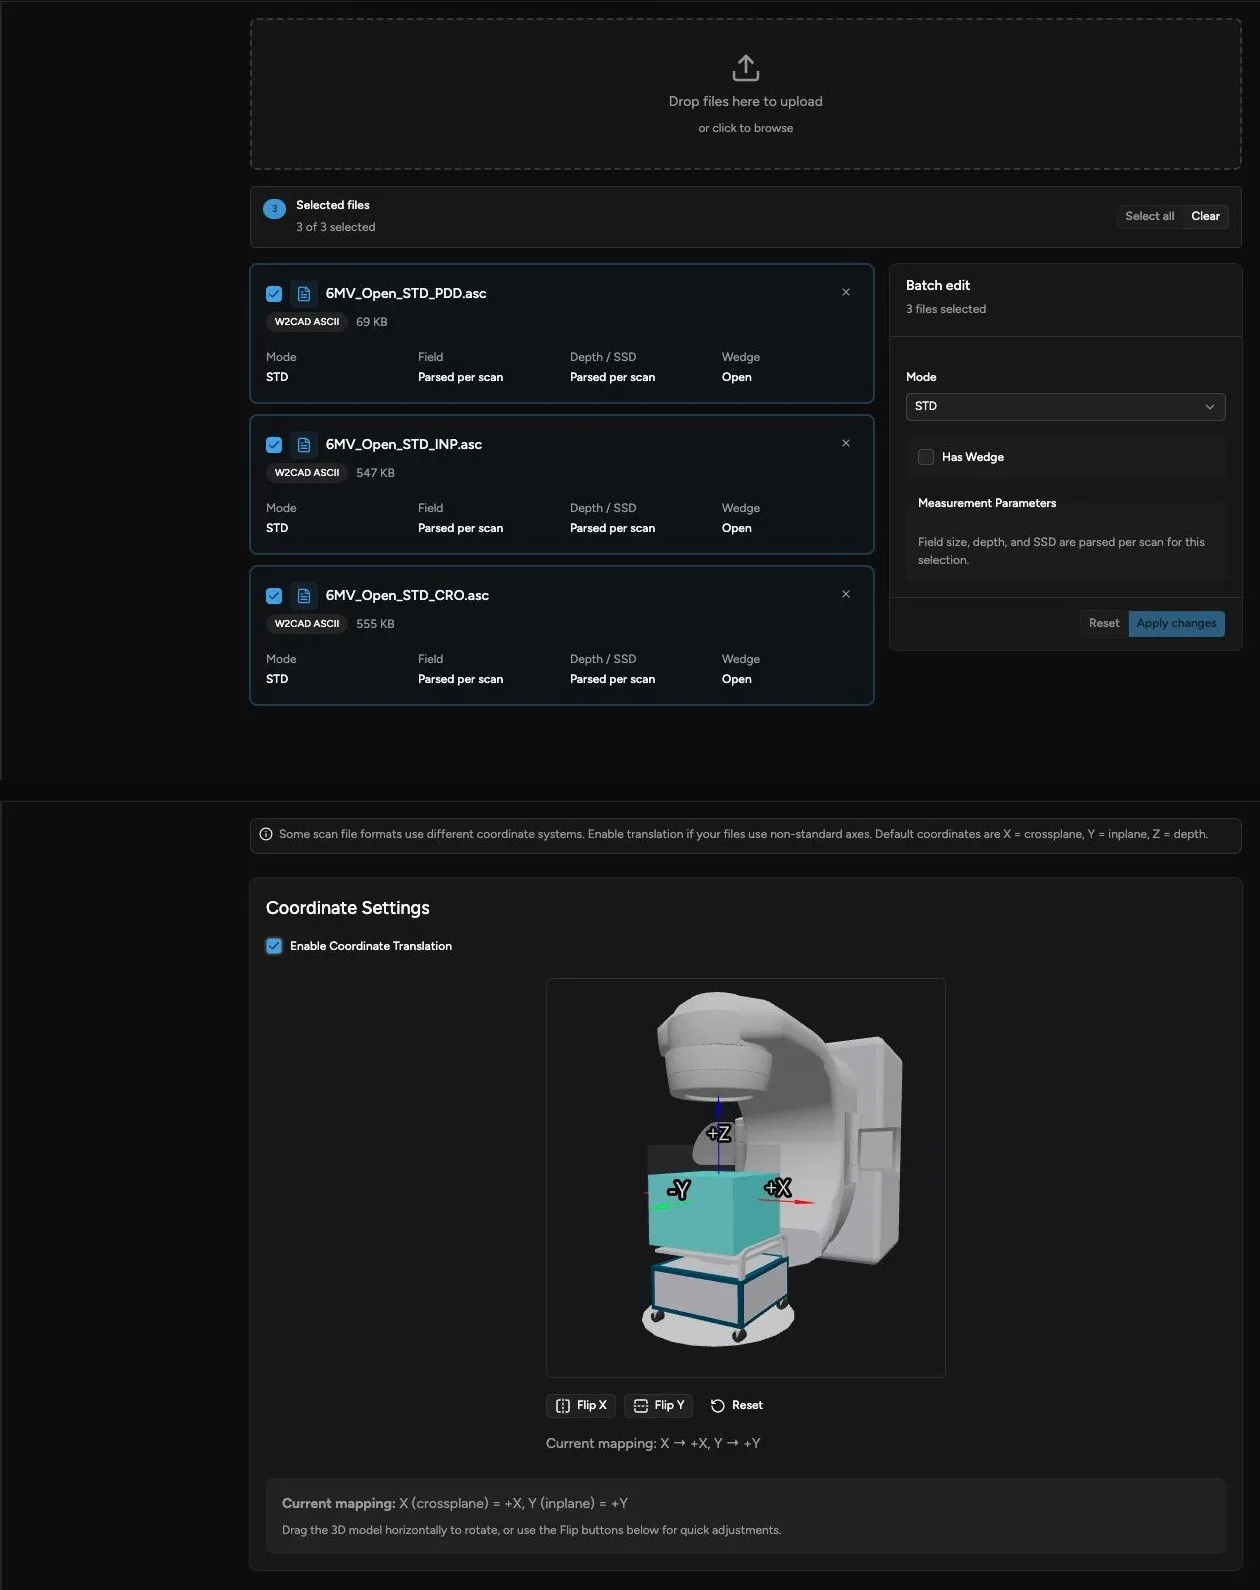
Quadrant checks file contents as well as extensions. After upload, review the detected scan information before importing. Correct anything that was not detected correctly, such as energy, scan type, field size, wedge, or mode.
File Import can also include an axis or coordinate mapping step. Use it when the coordinate direction or axis naming from the source system needs to be adjusted before import.
Duplicate Scans
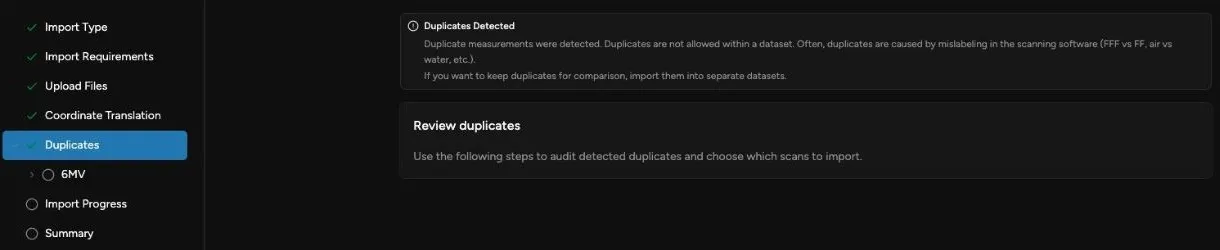
Section titled “Duplicate Scans”Quadrant does not allow duplicate scans in the same data set. A scan may be treated as a duplicate when it has the same measurement setup as another scan in that data set, such as energy, scan type, mode, field size, depth, SSD, scan medium, and wedge.
If you need to keep repeated measurements with the same setup for the same linear accelerator, place them in separate data sets. For example, keep a commissioning reference, an annual check, and a troubleshooting measurement in separate data sets even if the scans use the same beam settings.
During File Import, Quadrant stops when it finds duplicates and asks you to review them before the import continues. Use the duplicate review to:
- compare the imported scan against the scan already in the data set
- view curve scans together on the chart
- choose which scan to keep
- select more than one supported curve scan when you want Quadrant to average them into one scan
Some scatter and EDW duplicate cases require cleanup before they can be imported. When Quadrant says manual cleanup is required, correct the source data or the existing data set first, then import again.
EDW Import
Section titled “EDW Import”Use EDW Import for enhanced dynamic wedge measurements. The workflow asks for the beam and wedge settings, then the measurement files.
Review the selected energy, depth, SSD, wedge orientation, and wedge angles before starting the import.
Wedge Factor Import
Section titled “Wedge Factor Import”Use Wedge Factor Import when an OPAB or OmniPro ASCII file contains matching open and wedged point-dose measurements. Quadrant calculates the ratios and adds only the accepted wedge-factor records. It does not add the source measurements or scans to the data set.
Confirm the suggested Wedge Orientation before importing. When the orientation cannot be recognized from the file name, select it yourself.
For prerequisites, step-by-step instructions, warnings, and result verification, see Import Wedge Factors.
TPS Import
Section titled “TPS Import”TPS Import has two parts:
- DICOM Generation prepares plan files from the selected data choices.
- Dose Extraction imports dose data back into the selected data set.
Review the generated plan summary before downloading or using the plans. When extracting dose, confirm that the upload belongs to the selected linear accelerator and data set.
Clipboard Import
Section titled “Clipboard Import”Clipboard Import is intended for scatter data copied from a spreadsheet or CSV-style table. Enter the scan metadata first, paste the data, preview the result, and then import it.
After Import
Section titled “After Import”When a scan import completes, return to Data > Scans and review the new scan entries. Check the scan list, visualization, and details before using the data elsewhere.
When Wedge Factor Import completes, return to Data > Scans, open Wedge Factors, and review the created records. A wedge-factor-only import does not create scan rows.
If Quadrant reports duplicates, review each duplicate before continuing. Do not average or replace scans unless that is the outcome you intend for the selected data set.
If Something Looks Wrong
Section titled “If Something Looks Wrong”First, confirm the header shows the intended institution, linear accelerator, and data set. Then compare the imported scans in Data > Scans with the original measurement software, TPS export, or spreadsheet. Check that the scan types, energies, field sizes, depths, wedges, and point or curve values match the source.
If the import went into the wrong data set, first determine whether duplicate resolution changed scans that were already there.
Use the cleanup procedure below only when the mistaken import added new records without replacing or averaging scans that were already in the data set. If you are not sure, contact your team before deleting anything.
Identify the Imported Records
Section titled “Identify the Imported Records”- Open Data > Scans.
- Select the data set that received the import by mistake.
- In Scan Data, identify every scan created by the mistaken import.
- Open Wedge Factors.
- Identify any records created by the same import.
Delete the Imported Scans
Section titled “Delete the Imported Scans”- Return to Scan Data.
- Select the scans identified during review.
- Click Delete.
- Confirm that the Delete Scan Data dialog shows the intended number of scans.
- Click Delete in the dialog.
Delete the Imported Wedge Factors
Section titled “Delete the Imported Wedge Factors”Skip this section if the mistaken import did not create wedge factors.
- Open Wedge Factors.
- Select the records identified during review.
- Click Delete.
- Confirm that the Delete Wedge Factors dialog shows the intended number of records.
- Click Delete in the dialog.
Verify and Reimport
Section titled “Verify and Reimport”- Confirm that none of the mistaken records remain in either tab.
- Select the correct destination data set.
- Confirm the institution, linear accelerator, and data set shown in the header.
- Import the source file again.